Being a blog about Autonomous Vehicles a bug fix like this should not have been posted. But this bug is something worth blogging about given the amount of headaches it actually gave us and the number of man hours lost just to it. I only managed to resolve the problem after finding a fix on an online forum and so decided to document it here.
Problem
The big problem we faced was getting Opencv on the Raspberry Pi to actually interface with the USB Webcam that we had. Calls to query and capture images from the webcam using Opencv would result in null results but it would somehow work with Motion and Cheese both Linux software for image and video capture. Kenny found an externally compiled binary which could help us capture the image but the data would be written to a location in flash which was a less than optimal solution given reads and write from RAM to memory would occur computational costs in software.
The following python source code with opencv 1 was used in the test runs to capture an image:
import cv2.cv as cv

cap = cv.CaptureFromCAM(-1)
cv.SetCaptureProperty(cap, cv.CV_CAP_PROP_FRAME_HEIGHT, 480)
cv.SetCaptureProperty(cap, cv.CV_CAP_PROP_FRAME_WIDTH, 640)

frame = cv.QueryFrame(cap)
cv.SaveImage('test.jpg', frame)
Attempts to save test.jpg as an image would only result in a null file even though “cap” was initialised as a proper CvCapture Class. A call to cv.QueryFrame() would only result frame holding a null value. Slowly, I realised that the problem was not localised on the Raspberry Pi but also existed on my build of Opencv in Ubuntu 12.10. The exact same code ran in the same bad fashion.
But after much wracking of brains and googling around on the net I discovered the root of the problem and the solution. The problem was that at compile time, the right software dependencies were not installed completely and one piece of software, libv4l-dev, primarily needed for the linux webcam video drivers were not installed prior to compliation. Linux relied on V4L, Video for Linux, drivers to interface with these webcams. In addition to that, the V4L flag was not enabled with the cmake configuration parameters. This resulted to V4L drivers not being utilised by Opencv which proved disastrous to our cause.
Solution
So after lots of toying around and hopping from blog and site to site, I’d recommend this solution as the optimal one I used for my later builds with a few edits:
1. Follow the instructions on this blog.
2. In the step whereby he configures the cmake config, replace the cmake configuration parameters with the following below:
cmake -D CMAKE_BUILD_TYPE=RELEASE -D CMAKE_INSTALL_PREFIX=/usr/local -D BUILD_PYTHON_SUPPORT=ON USE_V4L=ON -D BUILD_NEW_PYTHON_SUPPORT=ON USE_GStreamer=ON ..
Feel free to include more like Qt, OpenGL, Intel TBB for parallel code etc to improve your performance. I used the configuration above for builds on the Raspberry Pi since it does not have a very powerful processor and is also based off ARM and not Intel. The critical configuration parameter to note is USE_V4L=ON. That sets Opencv to utilise the V4L drivers.
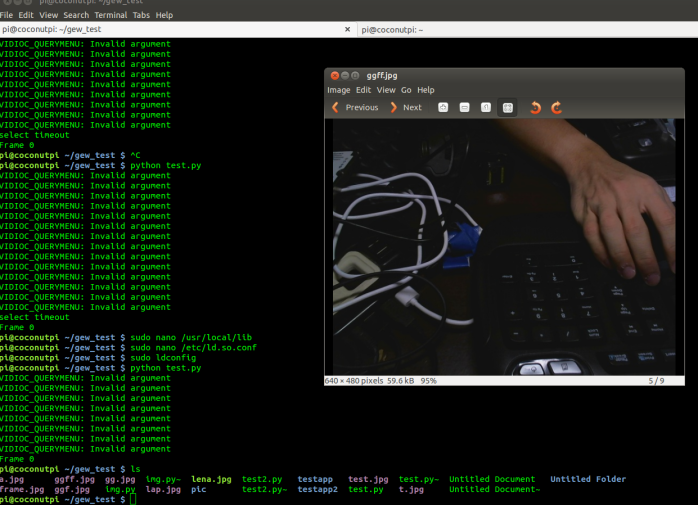
The output to the Python test source code above should look something like this (Look at the final python test.py output without the “Frame 0”) below. It was tested with a Logitech c525 Webcam which worked perfectly. Our other Webcam, a Prolink PCC 5020 would result in persistent “select timeout” errors as can be seen below too: